Project
Project overview
Each Minecraft project has a type and Minecraft version: Plugin (Paper), Mod (Fabric), or Data pack (Vanilla). It keeps your files, conversations, builds, and deployments together.
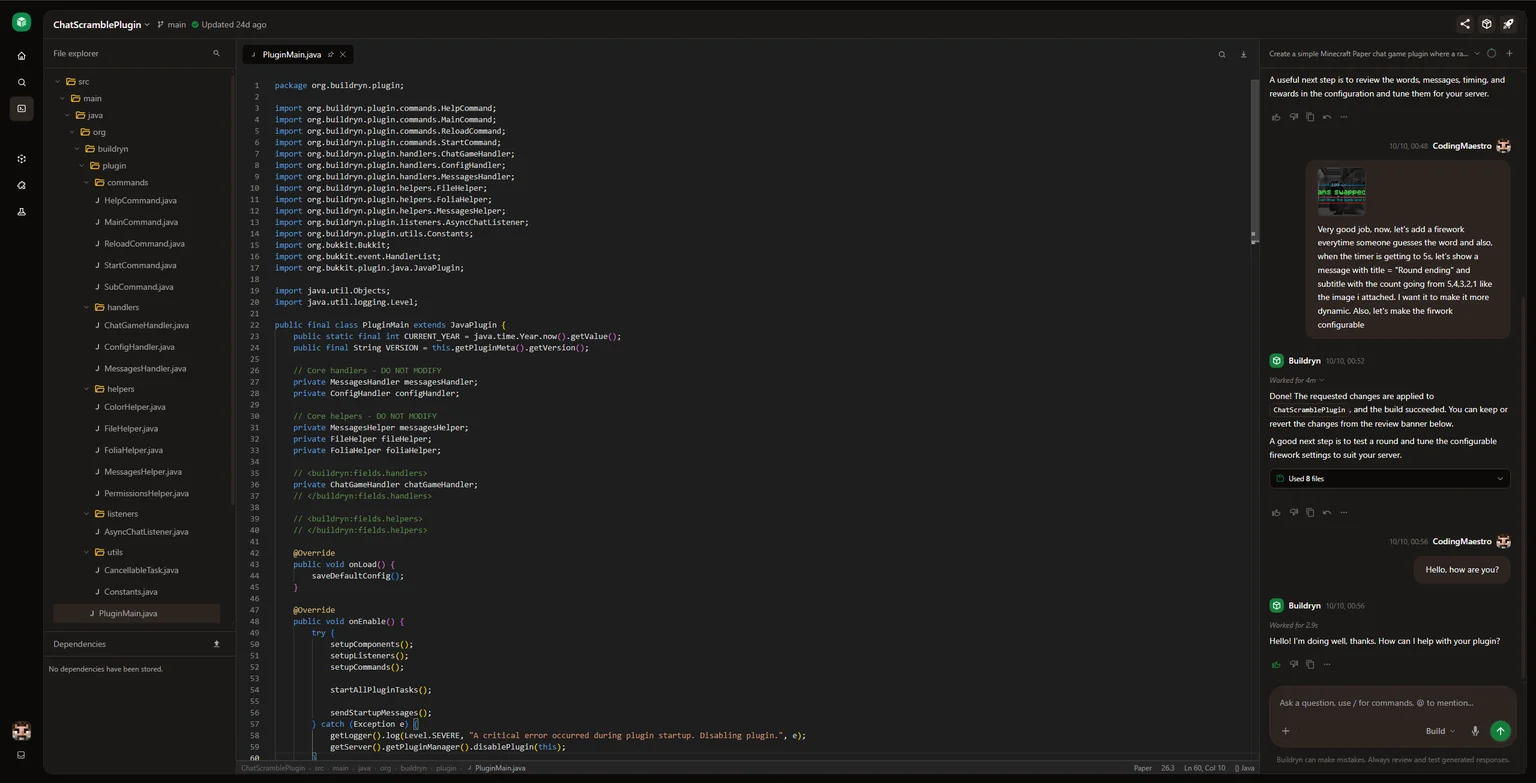
Open the right project
Section titled “Open the right project”Use the project catalog, search, recent projects, or the project switcher. Check the name and Minecraft version before making changes.
File explorer and editor
Section titled “File explorer and editor”Select a file in the File explorer to read or edit it. Search by file name, open several tabs, and save manual changes before building.
Paper projects also have Dependencies for uploaded plugin JARs and runtime libraries. See editing files and plugin dependencies.
Chat panel
Section titled “Chat panel”Use Plan to discuss a feature and Build to implement it. Type @ to reference a file or / to open the command picker.
Use the chat selector to switch conversations or start a New chat. All chats share the project’s files. The context indicator shows how much information the AI can use, not your credit balance.
See chats and context for commands and history.
Review controls
Section titled “Review controls”Open Total changes beneath a response to inspect file differences. Choose Keep all or Undo all before sending another implementation request. Save or copy unsaved edits before undoing changes.
Builds and deployments
Section titled “Builds and deployments”Builds
Section titled “Builds”Open Build history using the cube icon at the top right. Choose Build now to package saved files. The build list contains results, downloads, error logs, and security reports.
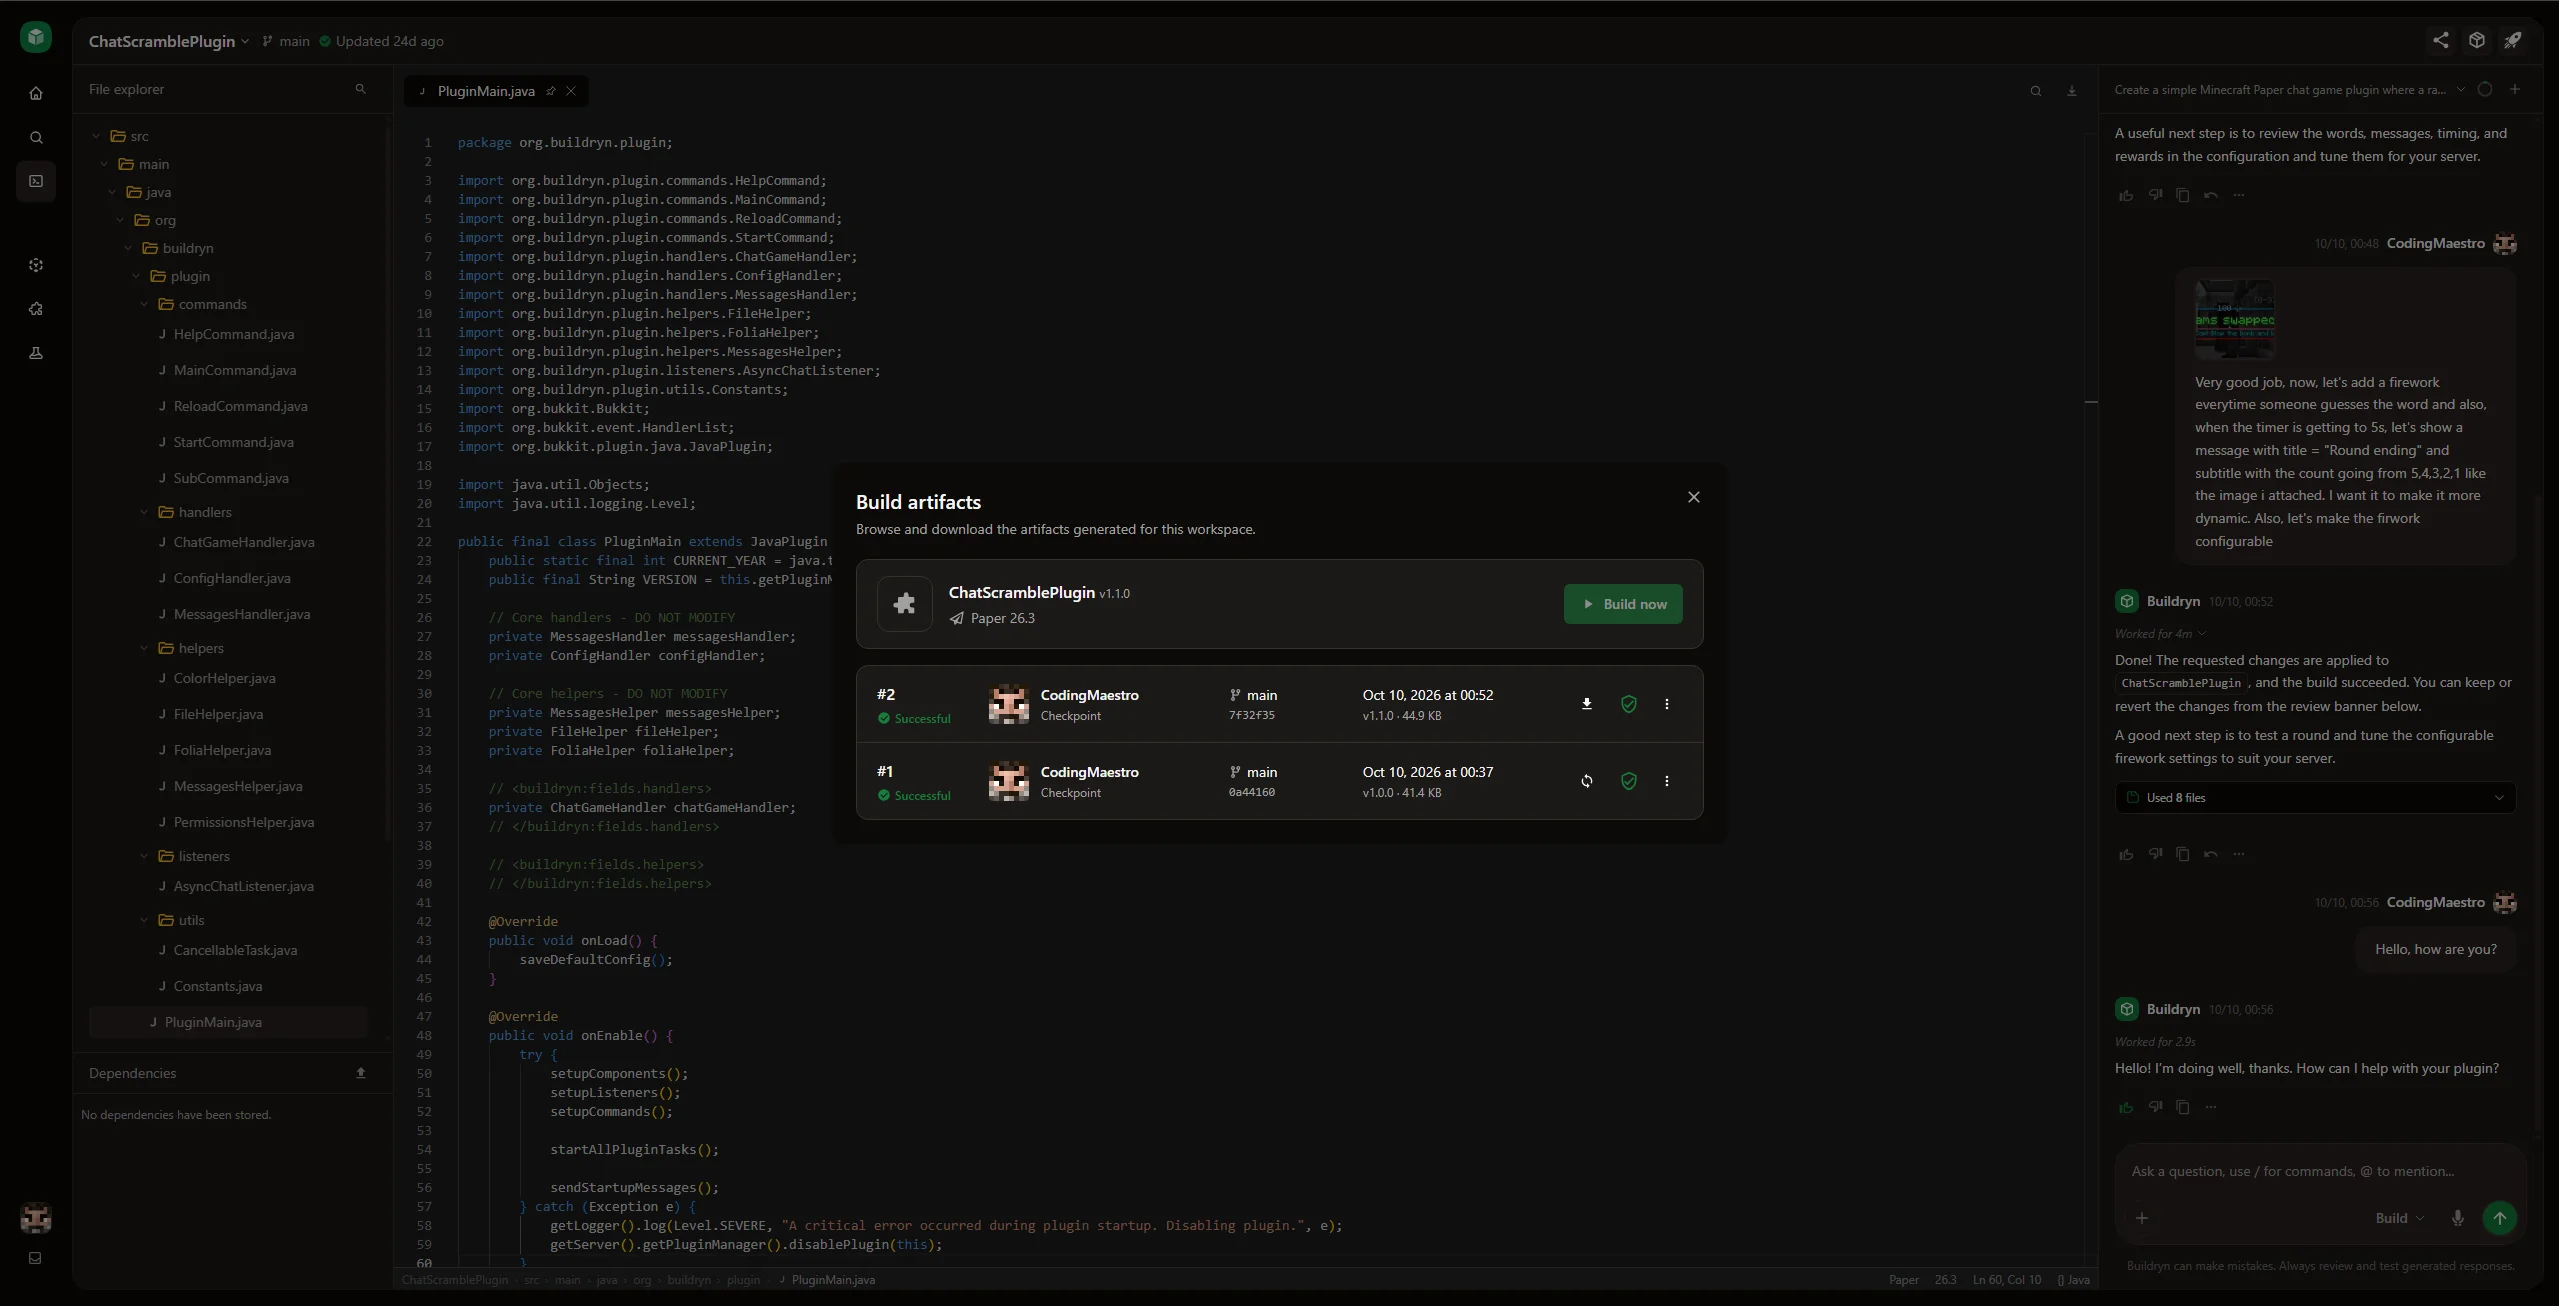
Deployments
Section titled “Deployments”Use the rocket icon at the top right to open Deploy artifacts. Choose Deploy now to test the latest build. Its dashboard contains Console, Files, Players, and Worlds, plus the server address and remaining time.
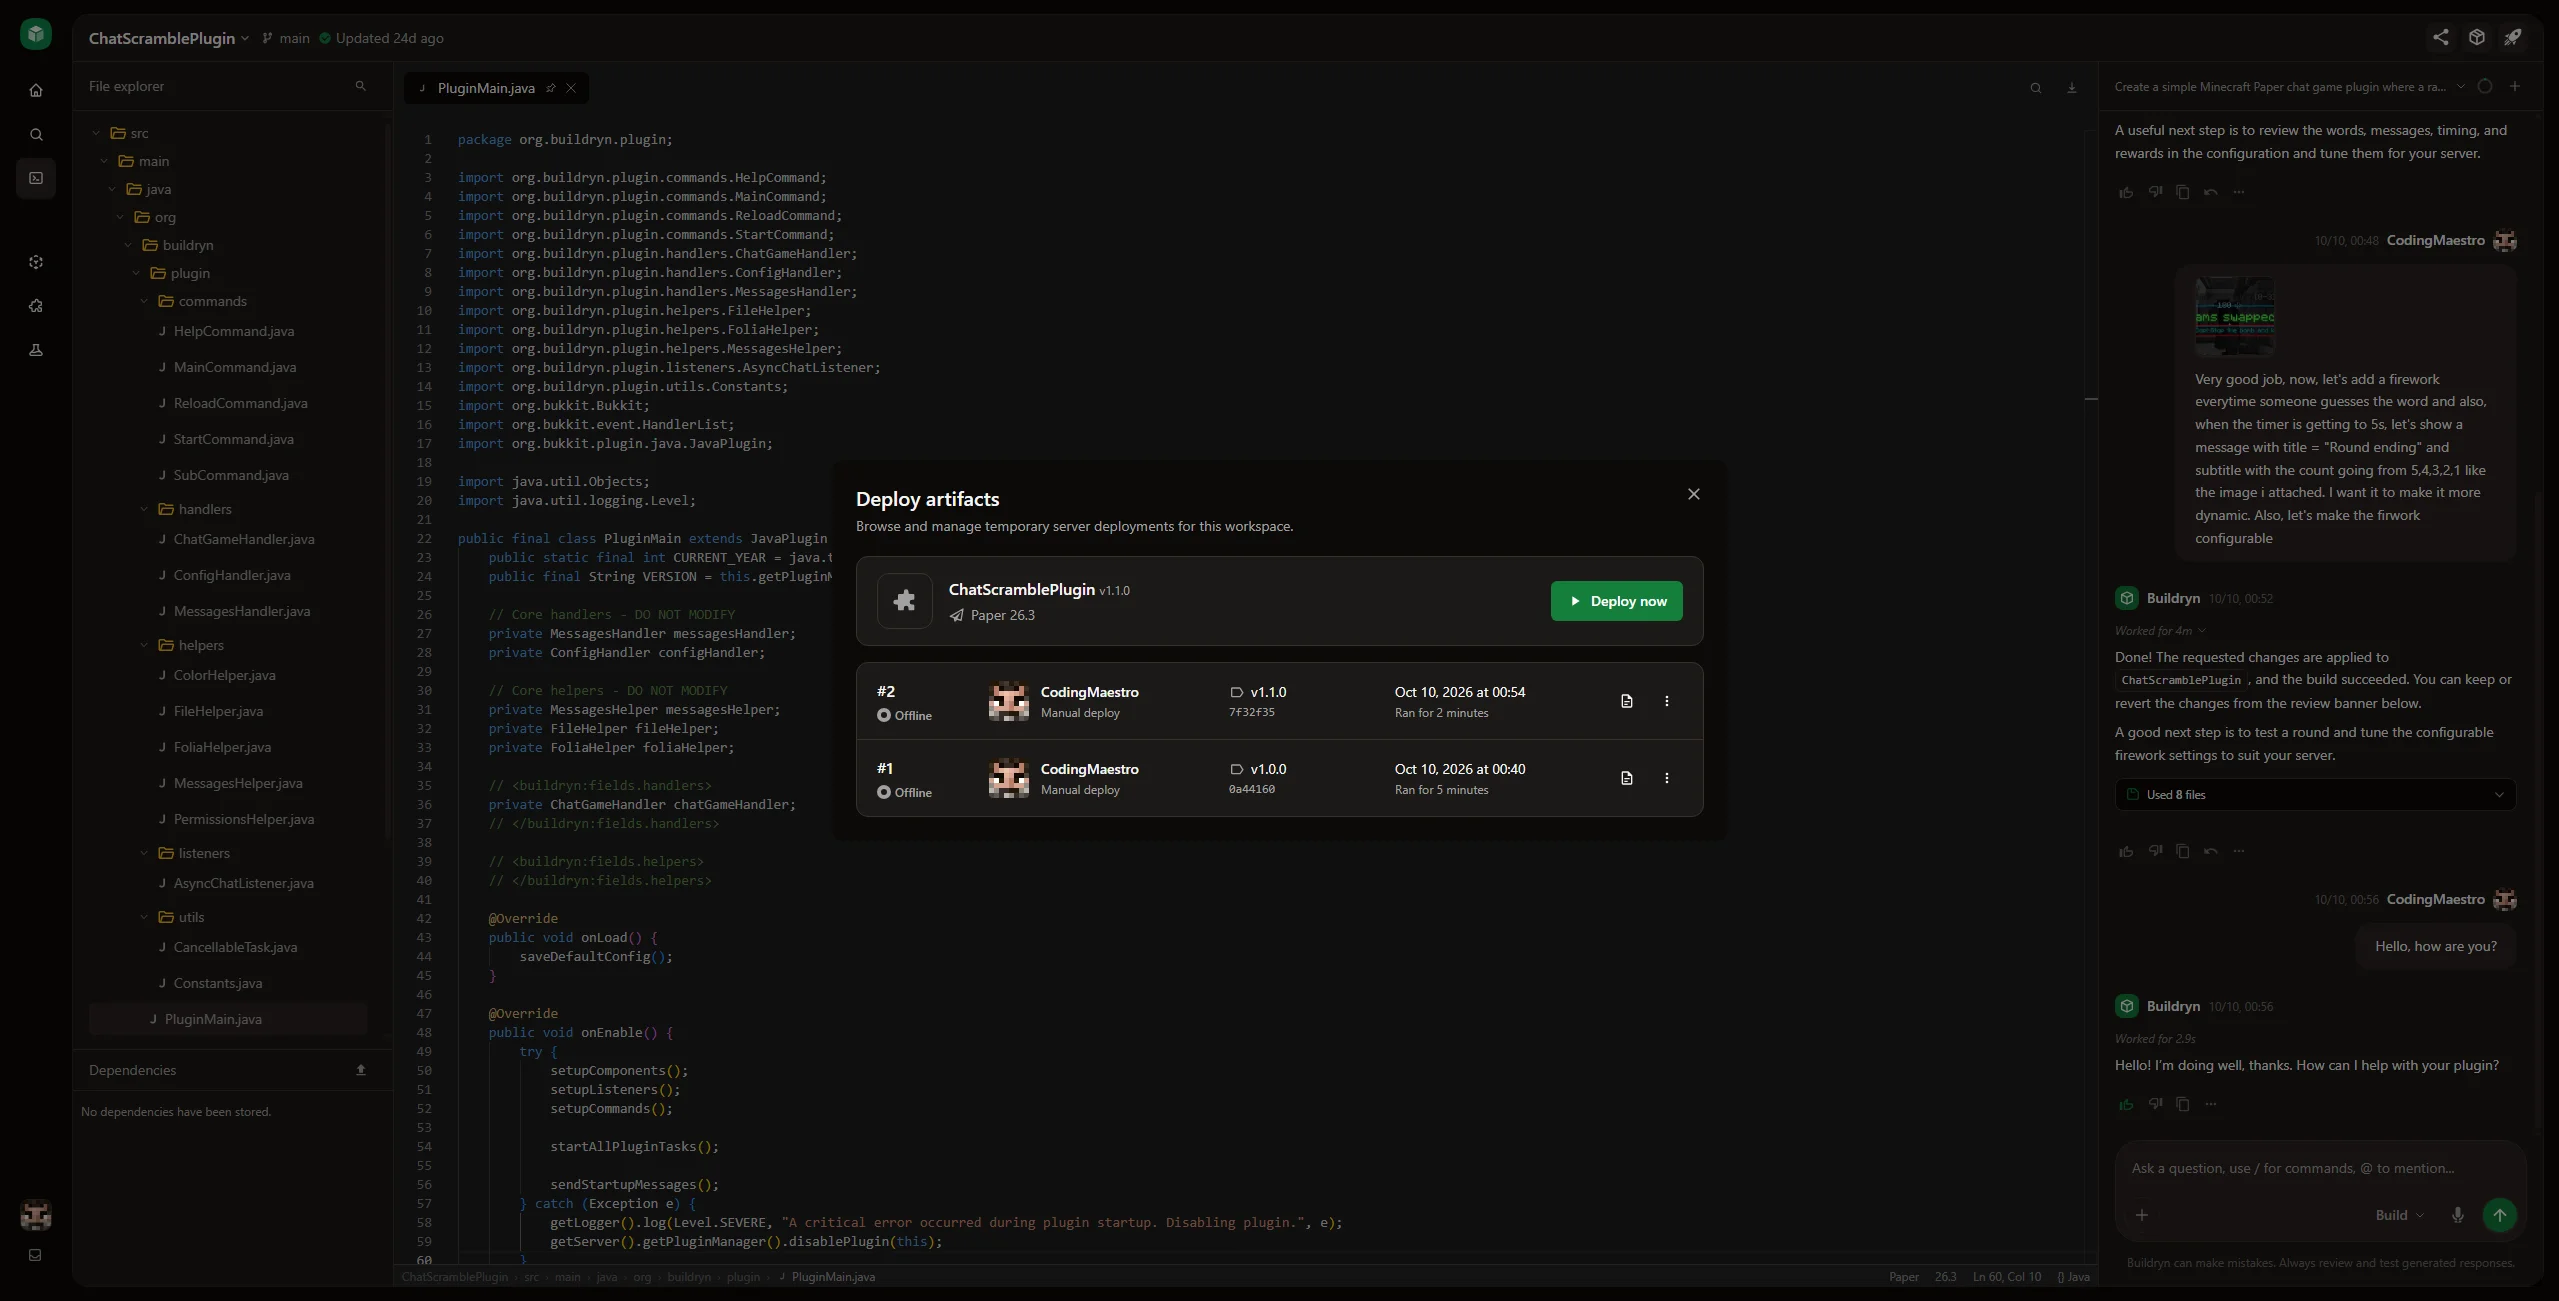
After editing source, build and deploy again to test the new version.
Project settings
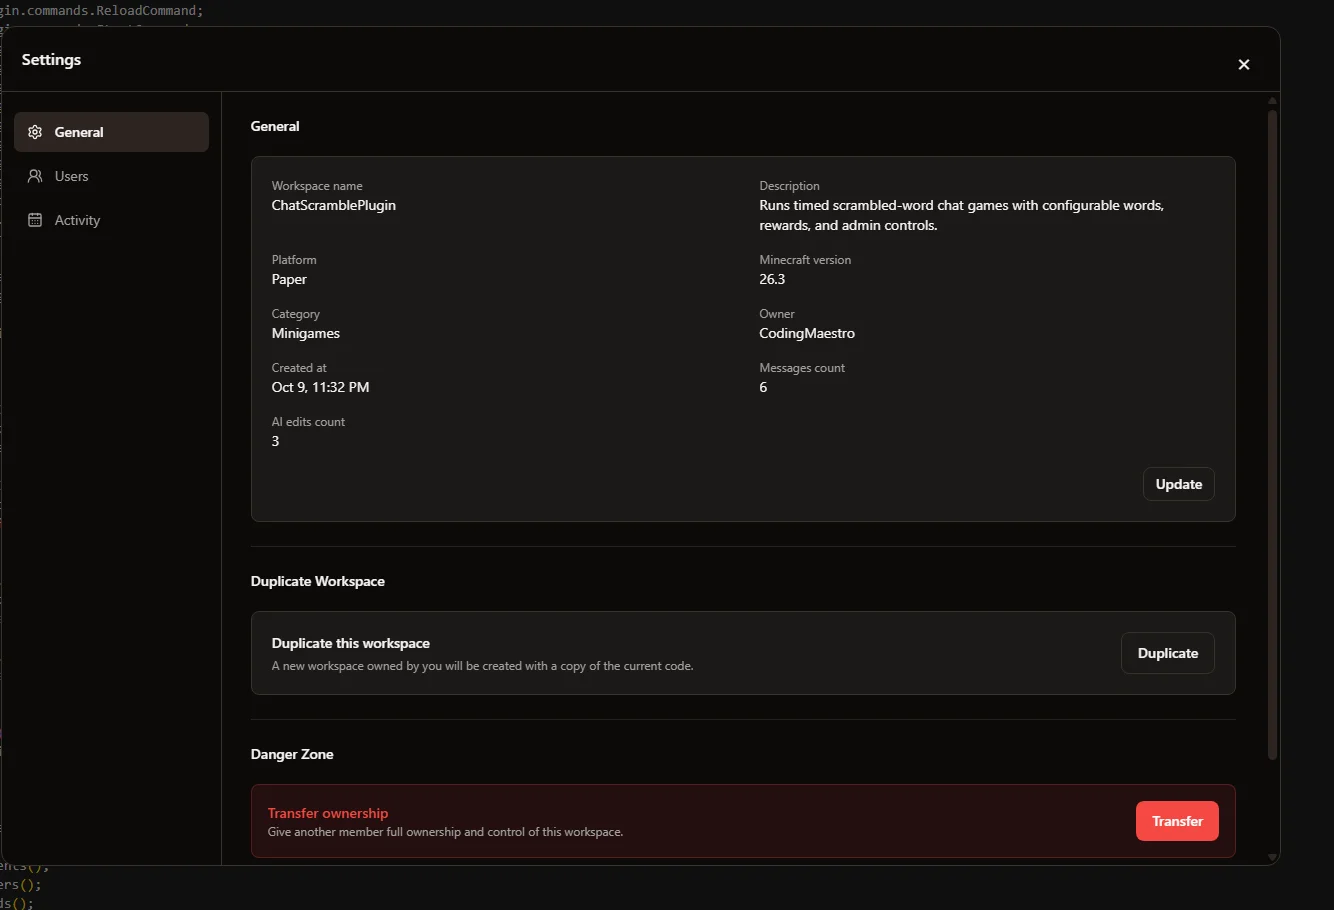
Section titled “Project settings”As the owner, open the project name menu and select the Project settings gear. You can also choose Settings from a project card’s three-dot menu in the catalog.
| Section | What you can do |
|---|---|
| General | Update project details, duplicate, transfer ownership, or delete. |
| Users | Manage members, roles, and invitations. See collaboration. |
| Activity | Review the heatmap and timeline, search, or export the log. See activity and ownership. |
In General:
- Update details: choose Update, change the name, description, or category, then Save. Renaming a project does not rename classes, commands, or plugin identifiers in its source.
- Duplicate: choose Duplicate to create a project owned by you with a copy of the source and details. It keeps the same type and Minecraft version, with separate chats, builds, deployments, and membership. The copy counts toward your owned-project limit.
- Delete: under Danger Zone, choose Delete and complete the confirmation. Save any source or artifacts you need first.
To hand the project to a teammate, follow ownership transfer. Use Share at the top right to invite someone; the collaboration guide covers roles and access.
Layout and presence
Section titled “Layout and presence”Drag the divider to resize chat on a wide screen. On smaller screens, switch between Files and Chat. Buildryn can remember layout preferences when you allow optional storage.
Collaborator avatars show who is present. Coordinate edits to the same file and resolve save conflicts before continuing.
A daily working sequence
Section titled “A daily working sequence”Save edits, resolve pending review, make one change, then build and test it.